User Interface
The overall user interface can be seen essentially as three main blocks: the main table, the filters and the details section (if visible) as depicted here:

Other views in the app might have more tables and tabs but the overall view and principles should be the same.
Tables
Every table has a Columns and View Selector on its bottom left corner. The column selector allows you to pick which columns are visible in the table. The views selector allows you to manage and switch between table views (more on this below).
Columns in a table can be:
- Reordered: by drag-and-dropping them into the desired location.
- Resized: by dragging the resize handle on its right.
- Sorted by: by clicking on the
 icon. To sort data by multiple columns, press and hold
 Shiftand click on the other column's header you want data to be sorted by. - Grouped by: by clicking on the
 icon.
icon.
Table configuration
For brevity's sake, when mentioning a table's configuration we refer to its state (visible columns, columns order, sorting, grouping and sizing) and currently applied filters (if any).
Views
Table views allow you to save the table's current configuration. This way you can save different Views depending on your needs and quickly switch between them.
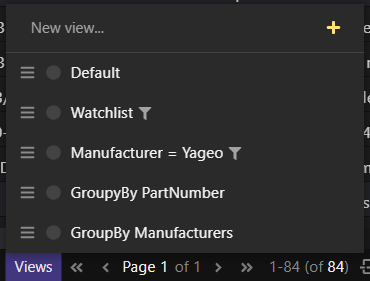
The more data you display, the longer it takes for the app to render it. In most cases, it shouldn't be problem but if you start noticing things getting slower, make sure to pick only the columns you need visible (and rows, by filtering data) at a single time and save that configuration into a View.
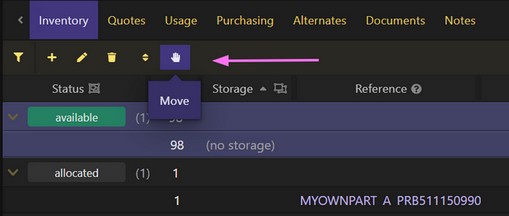
Action menus
To see what actions a table has available you can always check the buttons on top of it:
Or the context menu by right-clicking on the table:
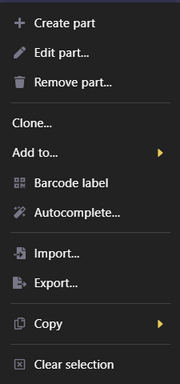
Some actions might be accessible only through the button or through the context menu (rather than in both places).
Shortcuts
Ctrl + 1/2/3...go to Parts/Projects/Production...Ctrl + Dtoggles Details panelCtrl + Ftoggles FiltersCtrl + H(or⌘ + Yon macOS) go to History (global)Ctrl + Ncreates a new row (i.e. part, etc)Ctrl + Eedits currently selected row(s)Ctrl + Delremoves currently selected row(s)Alt + ArrowLeft/ArrowRightgo back/forwardAlt + Btriggers one-shot barcode scanning mode (learn more)Alt + Aenables/disables table rows alternate coloring
On macOS use ⌘ instead of Ctrl.
Double-clicking a row will normally allow you to edit it (if the edit action is not disabled)